Google Colab and AutoML: Auto-sklearn Setup
Auto ML is fast becoming a popular solution to build minimal viable models for new projects. A popular library for Python is Auto-sklearn that leverages the most popular Python ML library scikit-learn. Auto-sklearn runs a smart search over scikit-learn models and parameters to find the best performing ensemble of models.

This tutorial describes how to setup Auto-sklearn on Google Colab. The complete notebook gist includes a toy project that uses an old Airbnb dataset from Kaggle.
The key first step is to install linux dependencies alongside Auto-sklearn:
!sudo apt-get install build-essential swig
!pip install auto-sklearn==0.11.1
After running these commands in Colab, restart the Colab runtime and run all commands again.
The Airbnb dataset can be used for a regression project where price is the label. I selected a few numerical and categorical features randomly so the dataset used for modeling has the following characteristics:
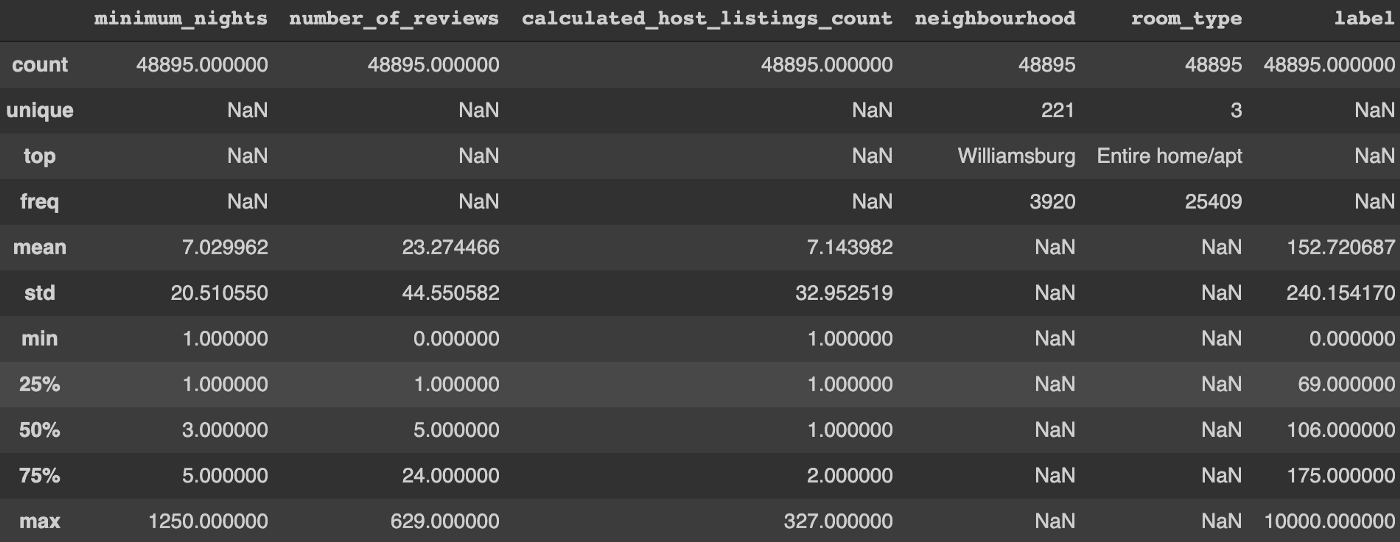
A more sophisticated ML project would require a detailed feature selection process and data analysis at this stage. For example, does the maximum value of 1,250 for minimum_nights make sense? In this case, I am simply showing the Auto-sklearn setup so I will skip these time consuming steps.
Next, all numerical features are standardized and missing values filled. Scikit-learn (and therefore Auto-sklearn) cannot handle string categories so categorical features are one hot encoded. Also, infrequently appearing categories are combined into a single bucket to combat the Curse of dimensionality. In this case, any neighborhood that appears less than 0.5% of the time is renamed to “neighborhood_other”. Before transformations, the first 5 rows of the training dataset have the following items:
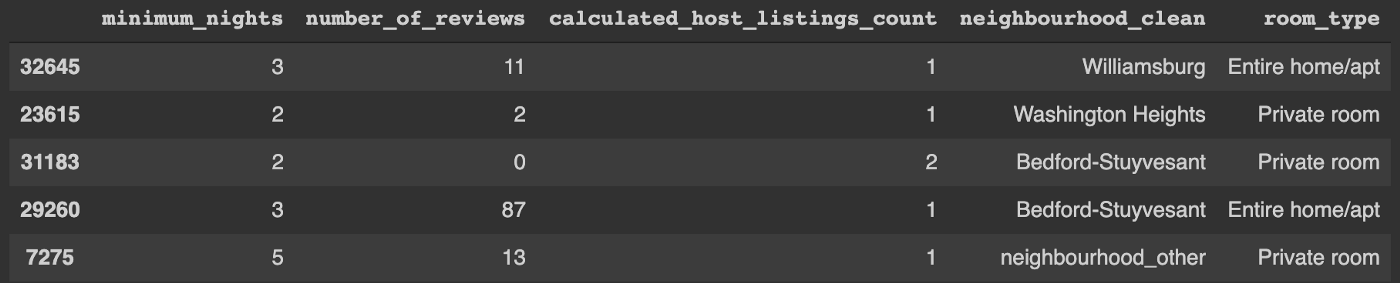
After transformations, the first few columns of the 5 rows look like this:

I am finally ready to explore Auto-sklearn using few simple commands that fit a new model:
import autosklearn.regression
automl = autosklearn.regression.AutoSklearnRegressor(
  time_left_for_this_task=120,
  per_run_time_limit=30,
  n_jobs=1
)
automl.fit(
  X_train_transformed,
  y_train
)
Finally, here is how the model performs on a test dataset:
import sklearn.metrics
predictions = automl.predict(X_test_transformed)
sklearn.metrics.r2_score(y_test, predictions)
 output: 0.1862
An alternative approach that doesn’t use Auto-sklearn would be to manually select a model and run a grid search to find best parameters. A typical, well-performing algorithm is RandomForestRegressor so I might try the following:
from sklearn.ensemble import RandomForestRegressor
from sklearn.model_selection import GridSearchCV
model = RandomForestRegressor(max_depth=3, random_state=0)
parameters = {
  "max_depth": (2, 3, 5)
}
grid = GridSearchCV(model, parameters, cv=5, scoring="r2")
grid.fit(X_train_transformed, y_train.values.ravel())
For comparison, the performance of this model would be:
predictions = grid.predict(X_test_transformed)
sklearn.metrics.r2_score(y_test, predictions)
 output: 0.0982
Impressively, the default Auto-sklearn R2 performance of 0.186 is nearly twice as good as simplistic scikit-learn-only performance of 0.098. These are not intended to be absolute benchmarks because I performed no customization but the relative performance is worth noting. The results suggest that Auto-sklearn can set a very reasonable lower performance bound that no model deployed in production should underperform.
More about me: adamnovotny.com