Machine Learning Tutorial #4: Deployment
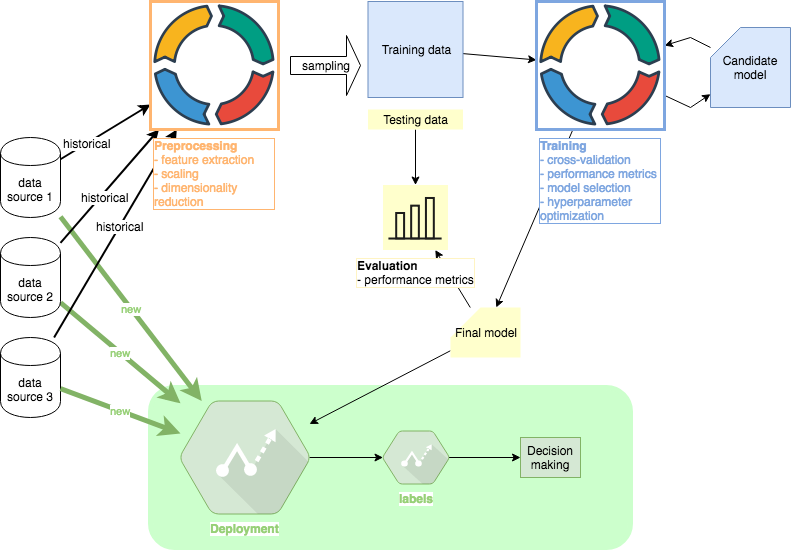
In this final phase of the series, I will suggest a few options ML engineers have to deploy their code. In large organizations, this part of the project will be handled by a specialized team which is especially important when scaling is a concern. Other tutorials in this series: #1 Preprocessing, #2 Training, #3 Evaluation , #4 Deployment (this article). Github code.
Stack Selection
The number of options to deploy ML code is numerous but I typically decide between at least the three general buckets:
- Solution provided as-a-service (e.g. Microsoft Azure Machine Learning Studio)
- Serverless function (e.g. AWS Lambda)
- Custom backend code (e.g. Python Flask served by Heroku)
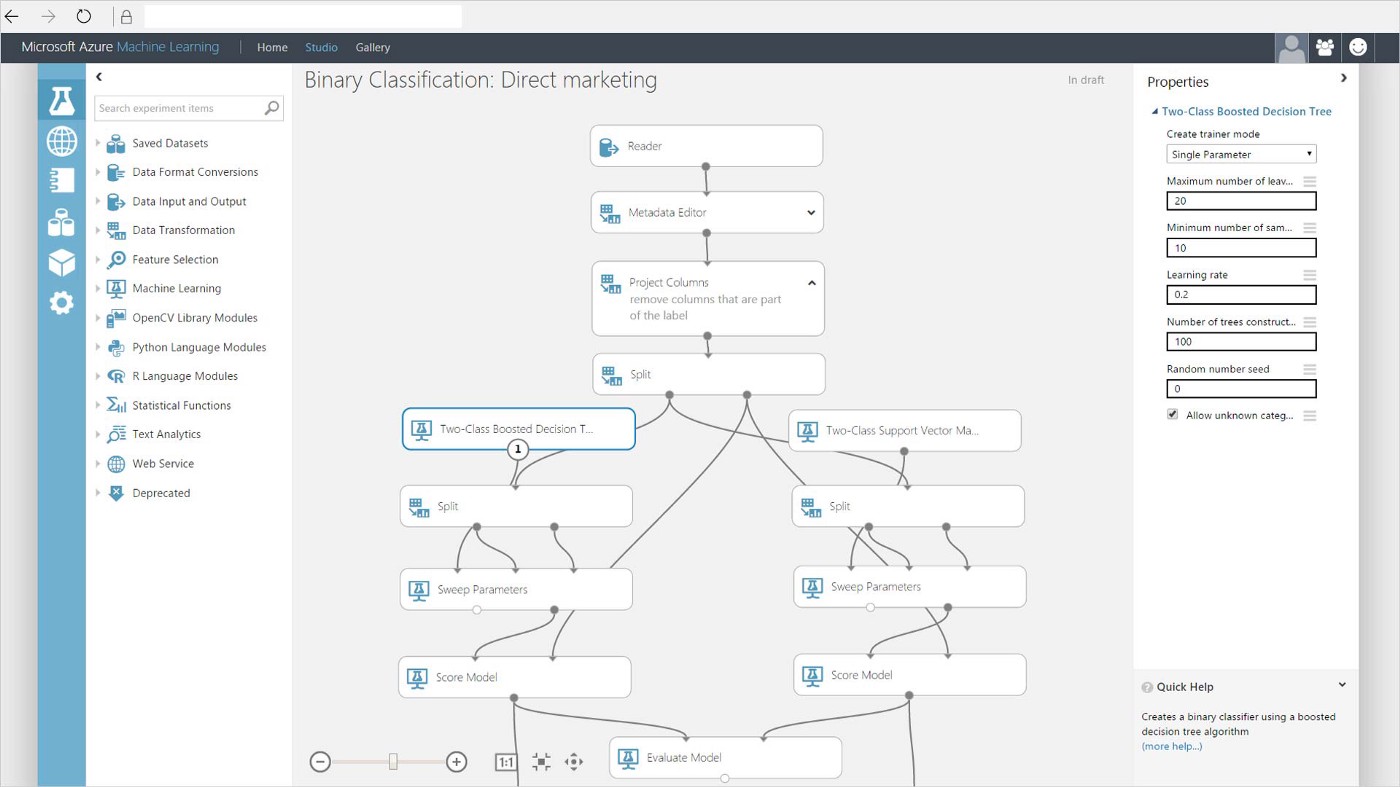
As-a-service solution
Platforms such as Microsoft Azure Machine Learning Studio offer the full suite of tools for the entire project including preprocessing and training. Custom API endpoints are usually easy to generate and writing code is often not necessary thanks to drag-and-drop interfaces. The solutions are often well optimized for lazy learners where evaluation is the most expensive computational step. The downside is that it is sometimes more challenging to bring in custom code (such as the final model) without going through all the project steps on the platform.
Serverless function
Serverless functions are a good solution for inexpensive computations. AWS uses default timeout of 3 seconds for a function to complete. While timeouts can be extended, the default value is often a good general guideline when deciding about suitability. Lambda only allows 50MB of custom code to be uploaded which is generally not enough for most machine learning purposes. However, functions are well suited for fast computations such as linear regression models. Another downside is that platforms support only specific languages. In terms of Python solutions, AWS Lambda supports versions 2.7 and 3.6 only at the time of writing this article.
Custom backend code
Writing a custom backend code on platform such as Heroku or Amazon’s EC2 allows us to replicate fully the code we write on local machines. The code and server deployment can be fully customized for the type of ML algorithm we are deploying. The downside of such solutions is their operational complexity because we need to focus on many steps unrelated to ML such as security.
I will deploy the code on Heroku which offers a free tier for testing purposes. The lightweight Flask framework will drive the backend. The primary reason for this choice is that it allows us to reuse essentially all the code written in previous tutorials for the backend. We can install Flask with Python 3.6 and all machine learning libraries we use previously side by side.
The entire backend code to run the app is literally a few lines long with Flask:
import pickle
import pandas as pd
from flask import Flask, jsonify, request, make_response
app = Flask(__name__)
@app.route('/forecast', methods=["POST"])
def forecast_post():
    """
    Args:
        request.data: json pandas dataframe
            example: {
                "columns": ["date", "open", "high", "low", "close",
                   "volume"],
                "index":[1, 0],
                "data": [
                   [1532390400000, 108, 108, 107, 107, 26316],
                   [1532476800000, 107, 111, 107, 110, 30702]]
            }
    """
    if request.data:
        df = pd.read_json(request.data, orient='split')
        X = preprocess(df)
        model = pickle.load(open("dtree_model.pkl", "rb"))
        y_pred = run_model(X, model)
        resp = make_response(jsonify({
           "y_pred": json.dumps(y_pred.tolist())
        }), 200)
        return resp
    else:
        return make_response(jsonify({"message": "no data"}), 400)
- pd.read_json(…): reads data from POST request which is a json object corresponding to price data formatted the same way as Yahoo finance prices (our original data source)
- preprocess(…): copy of our code from the Preprocessing tutorial that manipulates raw price data into features. Importantly, the scaler used must be the exact same we used in Preprocessing so it has to be saved to pickle file first during Preprocessing and loaded from pickle now
- run_model(…): loads and runs our saved final model from the Training tutorial
- make_response(…): returns forecasts
Heroku
Deploying our prediction code to Heroku will require that we collect at least two necessary pieces of our code from previous tutorials: the final model (saved as a pickle file) and the code from the Preprocessing tutorial that transforms the original features we collected from the real world to features our model can handle.
I will not go into details about how to deploy a Docker app on Heroku. There are plenty of good materials including Heroku’s documentation, which is excellent. All the necessary code to run and deploy the Docker app on Heroku is also in the Github repo. There are a few key steps to remember:
- Save Dockerfile as Dockerfile.web which is a container of all code necessary to run the app
- Deploy container using command heroku container:push
- Release container using command heroku container:release
At this point our code is deployed which we can test using Postman to make a manual forecast request:
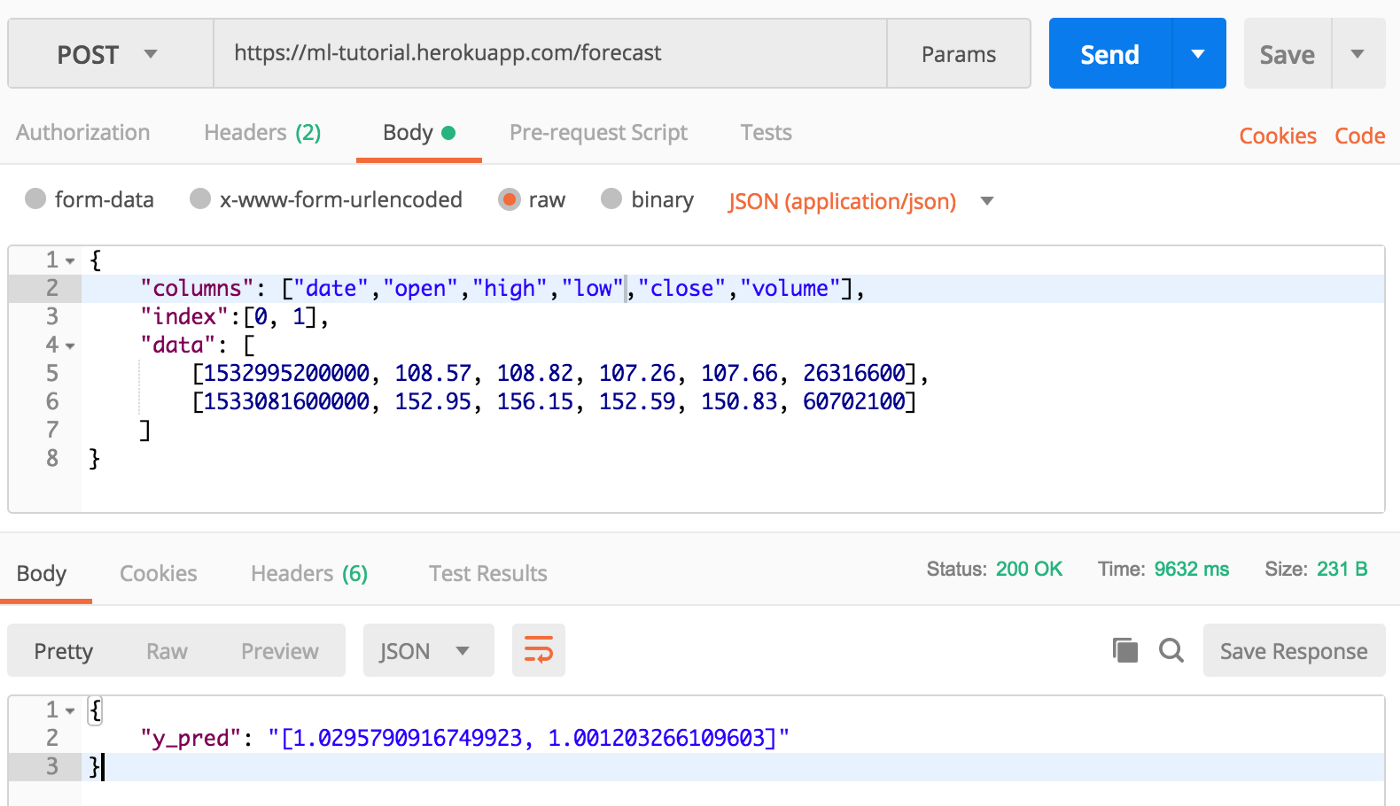
The date is represented by Unix timestamp. The first Body window consists of inputs we provide to the endpoint in the form of prices. The second window returns forecasts from the app.
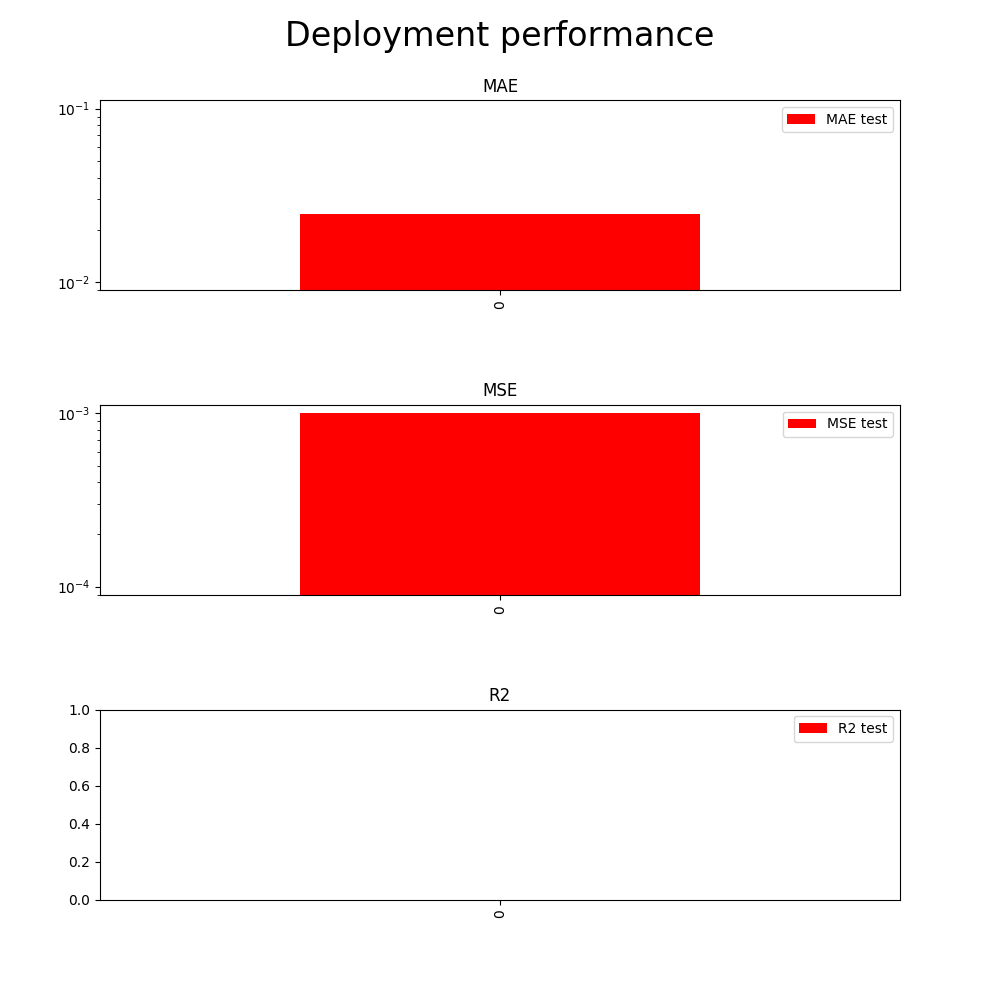
Testing
To test the implementation, I will reuse the code from the Evaluation step. However, instead of making predictions locally using our sklearn model, I will use the Heroku app to predict the 691 samples from Evaluation as a batch. The goal is for our predictions we made on a local machine to perfectly match those made using our deployment stack.
This step is critical to ensure that we can replicate our results remotely using a pre-trained model. The testing code is also available on Github. We confirm that the performance of our Heroku app matches the performance generated locally in the Evaluation tutorial:
To conclude, the project is intended to provide an overview of the kind of thinking a data science project entails. The code should not be used in production and is provided solely for illustrative purposes. As always, I welcome all constructive feedback (positive or negative) on Twitter.
Other tutorials in this series: #1 Preprocessing, #2 Training, #3 Evaluation, #4 Deployment (this article). Github code.