Serverless web apps with Firebase and AWS Lambda
Serverless has become a popular solution for small to medium-sized projects. The downside is a technology stack lock-in which forces developers to use technologies that might not be optimal for their projects. For example, people using Google’s Firebase to host their static resources have to write custom endpoint functions in JavaScript or TypeScript (as of August 2018). Developers typically use custom backend functions to hide business logic or proprietary data operations from users because anything that runs in the browsers front end as JavaScript is ultimately an open book from the users perspective.
One simple solution is to combine Firebase with custom functions using a different platform. I will outline the steps to create a Firebase-hosted web app, setup DNS for subdomain, and create AWS Lambda functions to serve custom business logic as APIs. This is just an example setup and all major cloud players provide solutions that can be combined in other ways such as using AWS S3 to host statics resources and Google’s Cloud Function to serve business logic API.
At the end we will have:
- www.example.com (single page app served by Firebase)
- api.example.com (AWS lambda function serving custom business logic used by www.example.com)
I will not go into specific details on each platform because their UIs constantly change. Instead, I will highlight the sequence of steps I typically take to setup the services quickly.
Firebase hosting
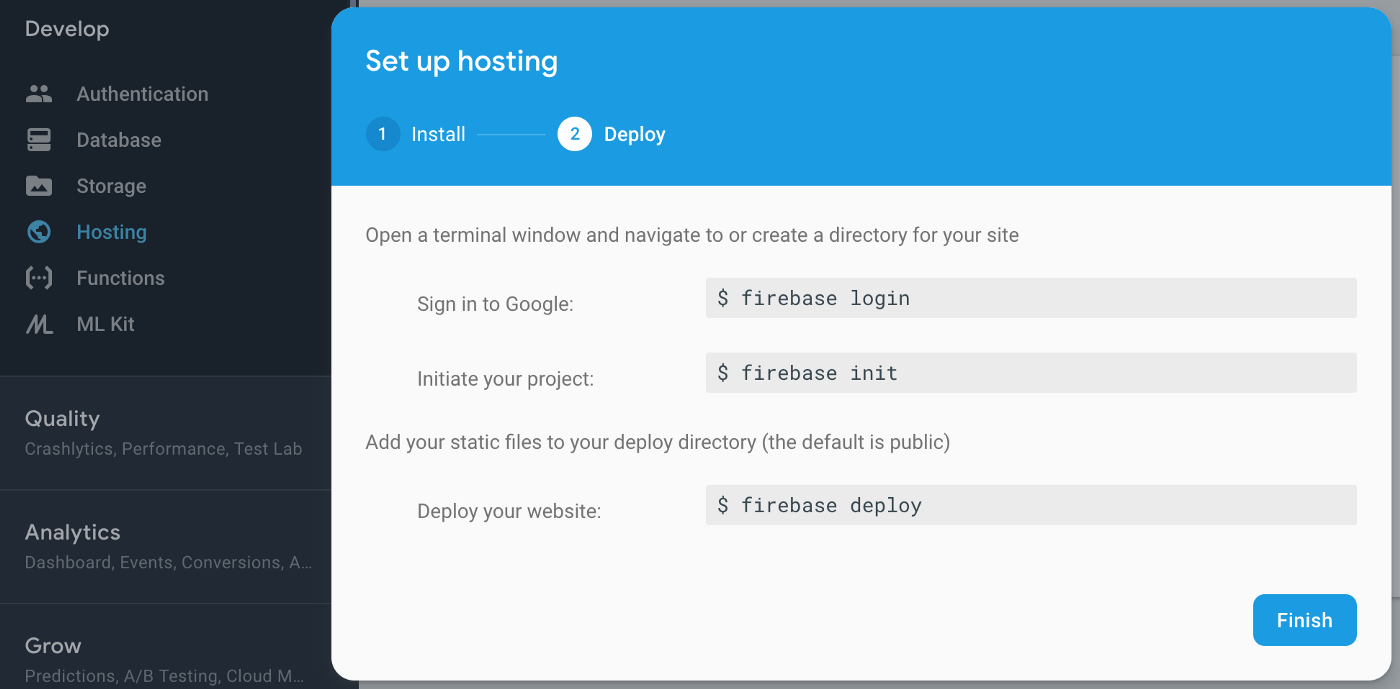
- 1) Deploy a static web app to Firebase by following this part of the Firebase documentation. The end result will be a public web app. Its URL will look something like this: my-project-name.firebaseapp.com
- 2) Let’s assume we purchased the custom domain example.com. We now need to update the DNS records so that example.com and www.example.com point to our static web app.
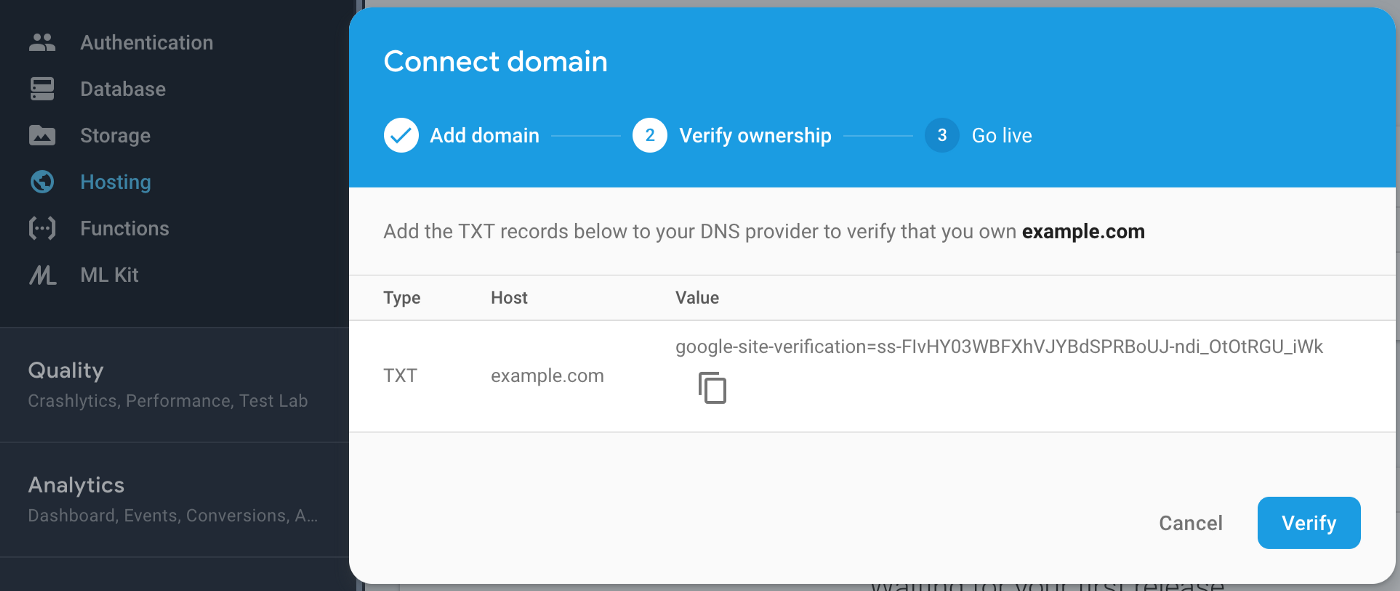
- 3) Go to your Firebase project dashboard and in the hosting section initiate the steps to connect to a custom domain. You will need to verify ownership of the domain by adding a DNS TXT record to your registrar’s DNS settings. As always, the documentation is useful.
- 4) Go to your domain registrar’s DNS settings, and create a DNS A record for subdomain www pointing to the IP address of the Firebase servers obtained in the previous step. After SSL certificates are automatically provisioned by Firebase, users can go to https://www.example.com to locate your Firebase app.
- 5) We also need to make sure that users entering just example.com are also pointed to https://www.example.com. To accomplish this, return to your registrar’s DNS settings and a setup subdomain forwarding. The exact steps vary for each registrar but the end result will be example.com -> https://www.example.com. If possible, set the redirect as permanent 301, forward path, and enable SSL.
AWS Lambda
At this point we have a web app deployed and using our custom URL. The app however uses the subdomain api.example.com to obtain proprietary data. In Angular, the code requesting data from the subdomain may look something like this:
const headers = {
    headers: new HttpHeaders({
      'Content-Type':  'application/json',
      'x-api-key': 'some-api-key'
    })
};
this.http.get('https://api.example.com', headers)
.subscribe((data: string) => {
    const dataJson = JSON.parse(data);
    // some data operations
    }
);
If our backend is relatively simple (doesn’t require large third party packages) and runs fast, the easiest solution is to deploy cloud functions at one of the largest providers. AWS limits Lambda deployments to 50MB and the default timeout is 3 seconds which are reasonable guidelines to determine whether your custom API backend is suitable for serverless functions.
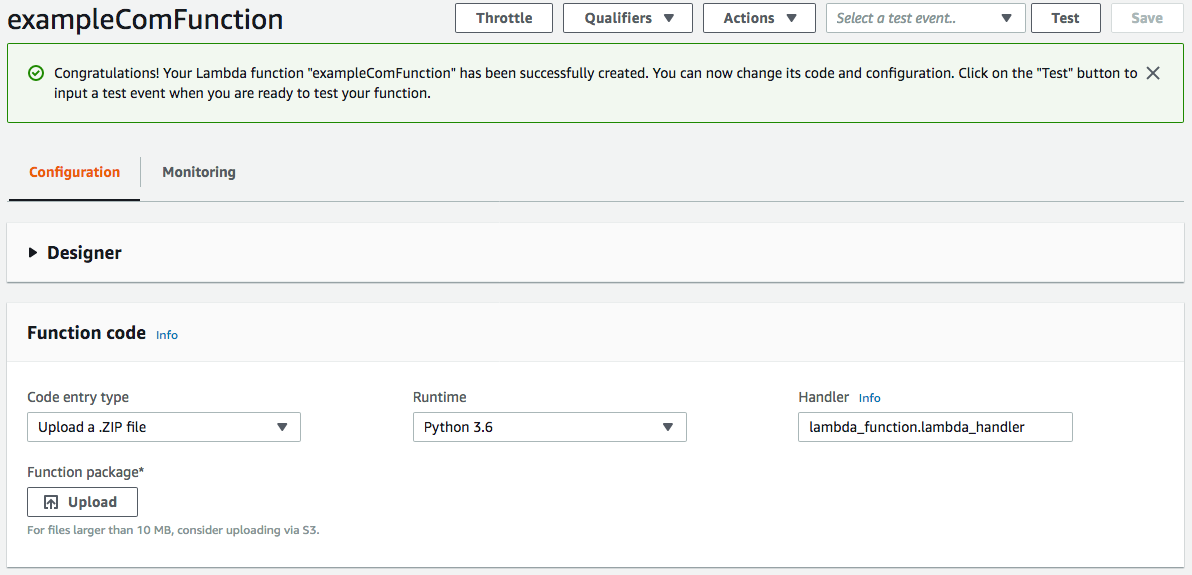
- 6) We need to create a Lambda function. I like to test my lambda functions locally and then deploy them as zip files to AWS. For Python, follow this tutorial. Lambda supports all major languages and similar tutorials exists for at least Node.js, C#, Go, Java.
- 7) Next we need to make the function publicly available so we will use API Gateway to create a public endpoint. Make sure to check that API key is required and then go to Actions and Deploy API.
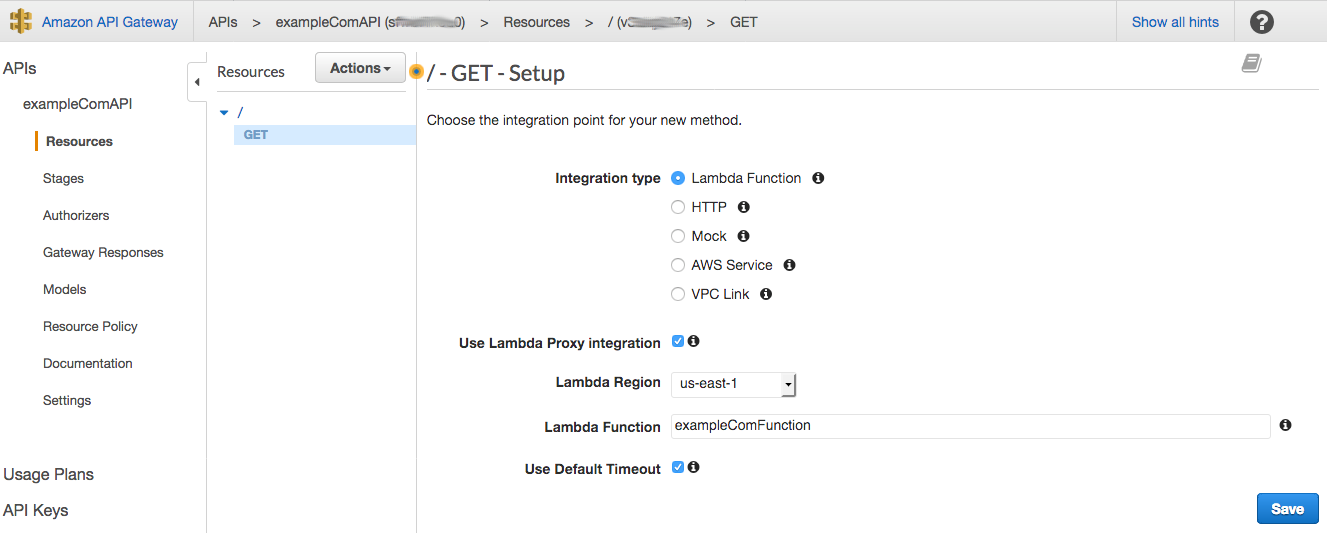
- 8) Secure the endpoint with at least an API key which can be created in the API Gateway as well.
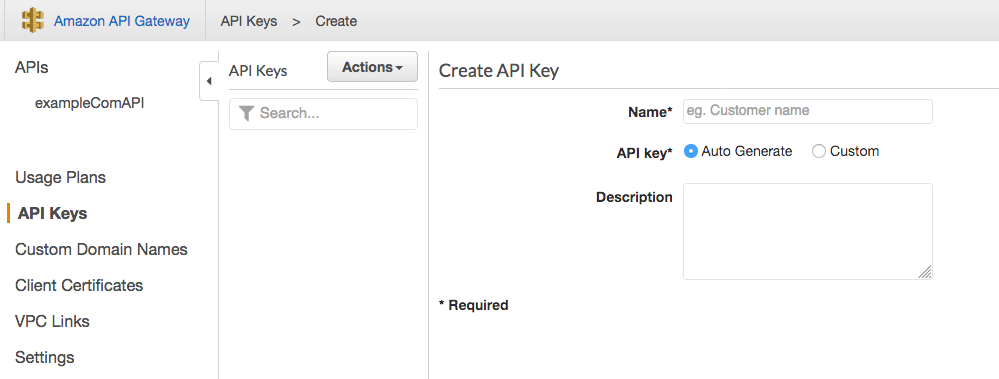
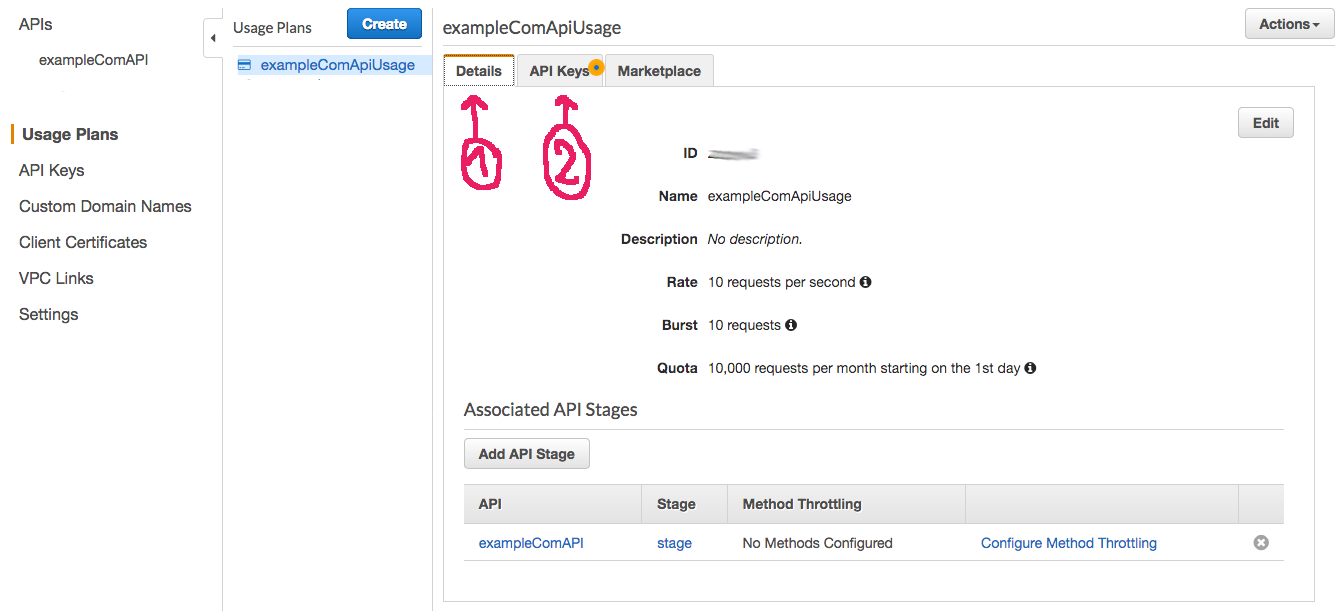
- 9) Create a Usage Plan that will limit how often your API can be used. This will prevent your Lambda function from being overused. While AWS Lambda has a very generous free tier, security is paramount for peace of mind. A Usage Plan basically connects the API key (step 8) to the endpoint deployment (step 7). At this point, you should be able to use your Lambda function by going to a URL that looks something like this https://xyz1234567.execute-api.us-east-1.amazonaws.com/stage. Remember that an API key is required as a header so tools such as Postman are useful to customize the API requests easily.
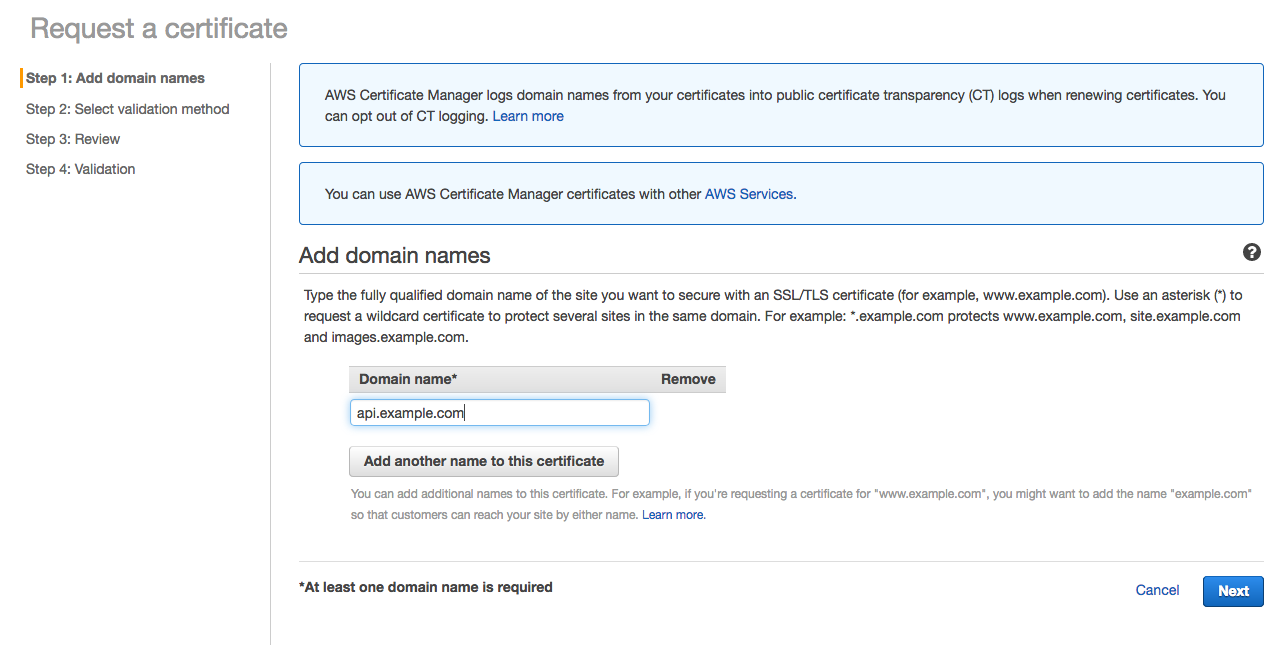
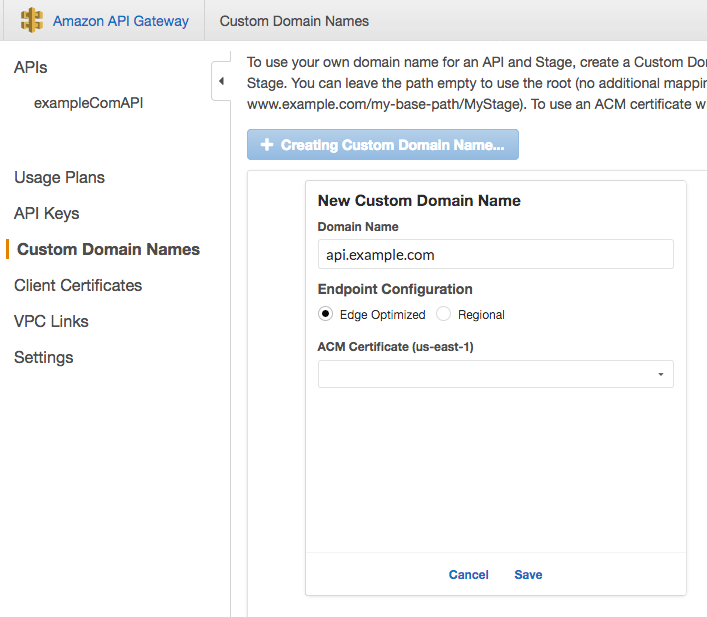
- 10) Ultimately, we want to have a nice-looking URL such as api.example.com instead of the long random URL above. First, we need to create a certificate for our subdomain to so that our connection supports SSL (https). Go to Certificate Manager and follow the steps to create a certificate managed by AWS:
- 11) Now that we have a certificate available, return to API Gateway and go to Custom Domain Names and create the API name (such as api.example.com) and select the ACM certificate created in previous step. Map it to your API deployment. This will generate a Target domain name of the form xyz1234567899.cloudfront.net.
- 12) Return to your domain registrar’s DNS records, and create a CNAME record pointing to the target domain name above (such as xyz1234567899.cloudfront.net). Now once DNS records propagate, requesting api.example.com is going to terminate at your Lambda function and will be accessible by your Firebase frontend.
That’s it! Now you can deploy a fully featured web app with a custom backend, URL and generous free tiers (as of August 2018). With a little bit of practice the process takes about an hour subject to DNS propagation and requires virtually no backend deployment knowledge. It scales well for most small to medium-sized apps that do not require specialized compute-intensive workloads such as Machine Learning (see my ML deployment article here).